


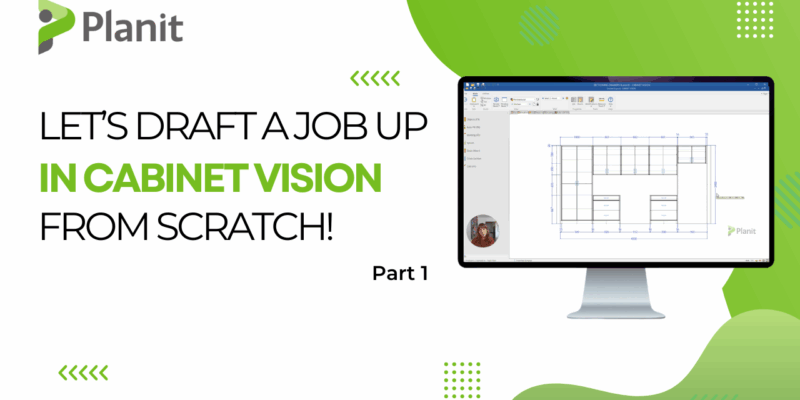
Let’s Draft Up a Job in CABINET VISION – Part 1: Layout, Setup & Smart Starting Moves
- 1.Become a CABINET VISION Power User: Navigating the Texture Manager [VIDEO]
- 2.A Guide to Panel Stock Materials in CABINET VISION [VIDEO]
- 3.Elevate Your Designs with CABINET VISION’s x2D CAD Multiplier [VIDEO]
- 4.How to Import and Install Packages in CABINET VISION [VIDEO]
- 5.How to Modify Cabinets and Expand Your Design Catalog in CABINET VISION [VIDEO]
- 6.How to Create a Toe Height Attribute in CABINET VISION: A Step-by-Step Guide [VIDEO]
- 7.How to Adjust Sunlight and Shadows in CABINET VISION Renders [VIDEO Tutorial]
- 8.Mastering Room Mirroring in CABINET VISION: A Step-by-Step Guide
- 9.From Design to Delivery: Splitting Large Parts in Cabinet Vision
- 10.Creating Stunning Curved Island Designs in CABINET VISION
- 11.Precision Placement: Using 2D CAD to Position Peninsular Walls in CABINET VISION
- 12.Yes, You Can Add Inset Drawers Behind Tall Doors in CABINET VISION—Here’s How!
- 13.Custom Drawer Dividers in CABINET VISION: A Smarter Way to Maximize Storage
- 14.Lost Your Work? Two Ways to Recover Jobs in CABINET VISION
- 15.Static vs. Live Drawings in CABINET VISION: What’s the Difference?
- 16.How to Add a Door Profile to End Panels & Save Custom Panels in CABINET VISION
- 17.Mastering Layers in CABINET VISION: Make Your Drawings Work for You
- 18.Let’s Draft Up a Job in CABINET VISION – Part 1: Layout, Setup & Smart Starting Moves
- 19.Let’s Draft a Job Up from Scratch in Cabinet Vision Part 2
- 20.How to Add Inner Drawers (Rollouts) in CABINET VISION
- 21.How to Create a Waterfall End Panel in CABINET VISION
- 22.Faster, More Accurate Cabinet Quotes: How Cabinet Vision Helps You Price Jobs With Confidence
Setting up a job in CABINET VISION starts with getting the basics right—from room layout and dimensions to cabinet placement and job defaults. In this first video of a two-part tutorial, Clayton walks through how to launch a new project, draw your walls, define key properties, and start placing cabinets with precision. If you’re looking to build smarter from the very beginning, this is your step-by-step starting point.
Watch the video below:
Click here for video script
Let’s Draft a Project from Scratch in Cabinet Vision!
Alright, so now’s our opportunity to draw up a full kitchen from scratch to show you all the different things about drafting all the basics that you’ll need to know. In this section, we’re going to cover how to set up a job, how to draw up walls, add cabinets to those walls, and then how to add bench tops. And finally, we’re going to go over a few basic modifications that you might need for a simple job.
We are going to keep things pretty simple for this example. We’ve got a house plan that we’re going to be working off of. It’s just a simple unit and all we’re going to do is draw up the kitchen. So you can see in this house plan that we have a background of cupboards with a stove in the centre as well as an island bench. We have one dimension given to us for that back wall. So we’re going to work with that, but other than that, we’re going to use a few assumptions that we’re going to make and some standards that we know to fill in the rest of the information to create a draft plan of this kitchen for the client or the builder.
Okay, so let’s jump into Cabinet Vision and we’re going to start setting up the ‘Job Properties’ to suit this job. We’re going to, first of all, on the main page, just hit ‘New Job’, and that is going to bring up a dialog box for us. Now, obviously, these are pretty self-explanatory, filling in the information for the job. We’re just going to call this job number one. The PO number is a purchase order number. If you have a purchase order or maybe an in-house way of numbering your jobs, that could go in that box there. And then the description could be whether it’s a commercial or residential job. The customer information is down there. Then, along this job tab, you’ve also got an area where you could add some comments or schedule. And we don’t need to do that at this stage.
So if we move down to room, we’re going to set up the room properties. So first of all, this is going to be for our kitchen. So our kitchen is going to be the name. Type of room is a ‘Room’, description is ‘Rooms’, so that’s all fine. Finishes, we are just going to leave as standard, because this is for the 3D or the texturizing views, we can just leave that as is. And then layout here is where we’re going to set up our wall dimensions. So we’re going to leave our thickness for our walls at 110 millimeters. I’m going to be using millimeters for this whole example, but I will show you how you can toggle between millimeters and inches in Cabinet Vision as well in case you want to stick with that imperial system. You can. But for this example, we’re doing it in millimeters.
So our thickness is 110, which is for a typical 90 millimeter stud wall with 10 millimeters of plasterboard (drywall) on either side. So that’s going to be our thickness, our height. We’re going to change this to be 2400 because in this scenario, we’re imagining that the builder has told us that they’re going to be installing a bulkhead above the kitchen. And I’m gonna make my sofa 20mm just to have a little shadow line from the ceiling.
So then if we jump down to cabinet, I’ve got a few defaults just set up ready to go and we’re just going to keep those pretty simple as is. In the next module, we’re going to go over all of the selections and options that you have in here in a lot more detail, but for now, you can either use the defaults that you have just set up in your Cabinet Vision, or you might have some defaults that your company uses for typical standard jobs, so feel free to put those in if that’s what you want to be learning with. So we’re just going to use some frameless cabinets. We’ve got Blum Hardware. In our materials, we’ve just got some colour board and some white carcasses. Hardware, a standard handle, and again, bloom hardware. Doors, we’re gonna have instead of oak doors, we’re going to just use that colour ply to match the panels and the materials. So, we’re just gonna select that. And we don’t need to have any flutes, because it’s not a fancy job that uses flutes.
So, then in layer. We have to tell Cabinet Vision basically the sizes that we want our cabinets to come in automatically at. So for this job, like I said, we don’t have tons of information, but we do have some standard figures in the back of our mind that we’re going to use. So a typical bench top height for most kitchens is about 900mm. So that would be our base finished height. But in this area, it’s actually asking us for the base carcass height. So that’s going to be the finished height minus the thickness of the bench top itself. So in this case, we’re going to have a 9, I’m just going to bring up a little calculator so you can see what I’m working on. We’re going to have a 900mm finish height and we’re going to take off 33mm for the laminate bench top. Which gives us 867. So that’s going to be our carcass height.
And for the depth, again, it’s not asking us the overall depth. It’s asking us the carcass depth. So the overall, we’re going to go for 600 again, pretty standard depth. And we’re going to take off 35 millimeters for an overhang. So it gives us 565. Which is a bit of room for the handles not to stick out too far from the cabinets as well as for the doors to sit well underneath the profile of the benchtop (counter top).
We’re gonna skip upper and come back to that in a second. So we’re gonna go down to tall. The tall height is gonna be the height of the room minus the socket. So that’s gonna be 2380, 2400 minus 20 millimeters. And the depth we’re going to leave 580, again, the carcass depth plus the door thickness to equal 600. So we’re allowing 20 millimeters for doors and 580 for the carcass.
For the upper, this is where we can use our calculator again. So we’re going to take the toll height, 2380. We’re going to take off the height of the base cabinets, finished height, 900. And we’re also going to take off a height for a splashback (backsplash). Again, in this job, we’re going to assume a 600 millimeter splashback (backsplash). So take off 600. And that leaves us with 880. So that’s going to be our upper height. And we’re just going to leave the depth at 300 for now, because that’s a nice depth for an upper. We don’t need to worry about filling in any vanity sizes, because we’re not going to be using vanity cupboards in this kitchen.
So then we go down to countertop. We’ve got a laminated top selected in our construction method. The material is laminate, and for the profile, this is really just for, the appearance of it in the 3D, but we’re just going to pick a rounded profile for the front of it. And again, lay out, we’ve got the amount that we want it to overhang. So like we said, we want to allow 35mm overhang, and we want to keep our overhang consistent on the front and edges of our bench shop, so 35, 35. And we don’t have any molding to do in this job because again, we’re keeping it simple, so we don’t need to fill out any of this, so we’re just going to hit OK, and then that is going to generate a new job for us.
Alright, so now, job is all set up. Our next step is going to be to look back at our plans and work out how we’re going to draw up our walls and then start putting those in.
Let’s Add Our Walls!
Alright, so now it’s time to get started with drawing some walls, which is very exciting. But before we just jump in to actually just whacking some walls on the page, there’s a couple of things that I want to explain and that I really want you to try and understand which will make your life so much easier as you’re drawing up different sorts of rooms in the future. So the first thing is understanding perspective in Cabinet Vision. This relates to how 3D’s work down the line. And also secondly, understanding the fact that every wall has a front and a back in Cabinet Vision.
So what I’m gonna do just super quickly without explaining what I’m doing is just draw up a couple of sort of little example rooms. One is… so the one on the left here, I’ve drawn up three walls with an open area at the bottom. And in Cabinet Vision, the way that perspective works is that it’s almost like the viewer, the client or us, we’re always, when it comes to the 3D, it’s like we’re standing at the bottom of the screen, at the bottom of the page, and we’re going to be looking up into the room. So if I quickly click on 3D and just go back to the standard view, I also make it textured, you were able to see… That first room, I am now looking into the room, whereas the second room on the right-hand side, I’m looking at the back of the wall. So if I tip it up, you can see a bit better that; the one on the left, I can see into it, the one on the right, I can see the back wall.
So, as much as possible. It’s not always feasible because of different scenarios that you might have going on. But as much as possible, it’s best to try and orientate your room so that you’re looking into it from the bottom of the screen. So sometimes you might have cabinets on all three of those walls, and when you’re getting into the 3D you’re going to have to twist around a bit to look into the room at different angles anyway, and that’s totally fine. But it’s still going to be easier if we draw it up like the left-hand side as opposed to the right-hand side. It’s just going to make your life a lot easier down the track.
And the other thing to note is the front versus the back of the wall. If I just click to draw a wall, you’ll note that there is a thicker darker blue line at the bottom, and there’s thinner lines around the other three sides of that wall. The thicker blue line is representing the front of the wall. You can add cabinets to the back and to the front of walls, no problems at all. But generally we want to set up our walls in our room so that we’re adding more cabinets to the front of walls than the back. You can see on the, the one on the right hand side that those dimensions are sitting on the inside rather than on the outside, which then if we were to add cabinets inside that room. Those dimensions are going to get closer and closer together, and it’s just all going to become quite difficult to read. Whereas on the left hand side, once we start adding cabinets in, and it starts adding more dimensions for those cabinets, they’re going to continue to expand at the back of the wall, where we have plenty of room and plenty of space for them to be seen.
So with all that in mind, the way I like to think about it is to draw your walls in Cabinet Vision going clockwise around the room with yourself, your perspective from the bottom of the screen. So for now, let’s just get rid of all of these walls and we’re just going to move back to our example plan that we’re working off of. So you can see in this example plan, The back wall where the stove is, I’m actually going to sort of take that plan and tip it up so that I can look into the room from my 3D later down the line. So just going to keep that in mind and also take note of that back wall being 45, 20 millimeters. I need to keep that in mind. I don’t have dimensions for the side walls, but I don’t really need them because it’s not critical to the design. So I’m just going to make them a nice length to show that they continue down past the island without really worrying too much about their exact dimensions.
So, let’s go back to Cabinet Vision and we’ll drop some walls a bit slower this time. So, to drop walls, you have to be on your plan view. If you’re on elevation, there’s no button to drop walls. So make sure you’re on plan view first and then you can click on walls. So up the top here, the little bar will change. Automatically it might be set on line or chained line, pretty much self-explanatory. The chained line is just going to keep drawing lines off of one another all connected, whereas ‘line’ is like lines that are disconnected from one another. There’s also a line box, which when you click and drag, we’ll draw four walls–all at once. My favorite is probably the chained line, but you can play around with these and see which one you like. You can also do curved lines, have bends, all that sort of stuff. But for now, let’s use the chain line.
So, you can start sort of anywhere on your page, but like I said, we’re going to go clockwise and we’re gonna draw a u-shaped room. So I’m gonna start sort of toward the bottom left-hand side of my screen. So to draw a wall, you just have to click once on your mouse and let go and then as you move your mouse up the page, you’ll see the wall start to be drawn. And you can see on the left in that little, highlighted area with dimensions. Those dimensions are changing as I’m moving my mouse. And the same thing with the angle. If I need to draw an angled line, I can move my mouse up and down. Cabinet Vision is quite intelligent and it knows that most of the time you’re going to want to draw your lines at 90 degree angles from each other. So it’s going to snap to that angle nice and easily for you.
So I’m going to draw this line up, but if I just click my mouse again, wherever I am, that’s going to be the size of my wall. And you can see it’s come out to 29, 29, which is fine, but it’s kind of a bit of a… ‘Why is it 29/29?’ Why isn’t it a nice round number? So if I just hit escape, I click on that wall and delete it. And start again. Again, click on chain line, and then click into the bottom left hand corner, drag my mouse up. Without– I’m not holding on to the mouse at all– I’ve just clicked. Let go, and I’ve moved my mouse up. And you can see how that length line is highlighted in yellow in the top left. If I type in a number on my keyboard right now, it’s going to replace that length dimension. So I’m just going to type in 2500, and hit Enter. And now you can see it, Cabinet Vision has automatically made my line, my wall, 25, 100 millimeters long. So it’s going to be a nice dimension for our side wall.
Now we’re up to the back and you can see because it’s a chained line it’s keeping those these two walls attached. So I’m going to come out at a 90 degree angle from the original wall and same thing. Now I want to write in the dimension of this back wall. On the plan, it was 4520. That plan and most builders plans that you get will be for your stud sizes. Because obviously the kitchen goes in after the plasterboard (drywall), we just need to take off a few millimetres for plasterboard (drywall) each side. So in this case, I’m going to do 10mm and 10mm. It depends who you’re working for and, all that, as to how much you take off, but probably 10 millimeters is a good guide to go by. So instead of 4520mm, I could do that, but I can also do maths in these little boxes. So I’m going to take off the 10 millimeters from each side, by going minus 10 and minus 10, and then I hit enter, and that gives me a 4500 millimeter wall.
So now as I move my mouse down, to complete my third wall, You can see that when I got to an equal distance with the wall on the left hand side, a little dashed line has come across and my mouse sort of keeps snapping to that point as I get close to it. So here I could type in my 2500 or I probably could just click and get a 2500mm wall. Because again, Cabinet Vision is quite intelligent and it realizes that you might want to have your walls lining up with one another. So that’s what it’s sort of suggesting to you there.
So now I’m done with my three side walls. I do need to draw a wall in for my island, but I don’t want it to be connected to this third wall, so to get out of this chained line, I can either hit the return up the top left, or I can just hit escape on my keyboard. Beautiful, so now we’ve got those three walls. I’m just going to hit escape again to get out of drawing walls completely. So hit escape again and one more time.
Okay, so now we need to work out the placement for our island in order to be able to draw the wall for the island. And you might be thinking, why do we need a wall for our island? It’s an island, it’s not attached to a wall. But in Cabinet Vision, every single cabinet, every single benchtop (counter top) that you bring in has to, it must be attached to a wall. The wall doesn’t actually have to be a physical–you know– timber, brick and plasterboard wall. It just has to be a part of the program, so that Cabinet Vision can attach cabinets to it.
So, first of all, we’re going to work out where it is, then we’re going to draw a wall, and then I’m going to show how it can change it from being a physically seen structured wall to what we call a peninsula wall, which is basically just a line on the page that we can attach cabinets to.
So, because if I go back to my plan, because I don’t have any dimensions between these side walls and the island or between this back wall and the island, I’m just going to work off of some sort of standard distances that would make sense for a nice kitchen. So in this case, I’m gonna allow a meter walkway all around the island. So, I could use walls to work with this out, but I find the easiest way is to do it with a bit of CAD. So I can either click on CAD down the side or I can just double-click anywhere in the white space. So double-click and then you can see up the top, I’ve been given a whole bunch of different tools I can use. And in this case I’m just going to use ordinary lines to start working out where my island needs to go.
So what I’m going to do is click from the corner of this left-hand side wall. I’m going to click, let go of my mouse, move my mouse out, and then I’m going to type in 1,000 millimeters or 1 meter, and hit enter. So now I have a line that shows me, okay, that’s going to be the starting point of my island out from this side wall, and I’m going to do the same from the right-hand side. So I’m going to click, let go, move my mouse, Type in 1000, and hit enter. Beautiful. So now if I want to know the distance between those two, how big my island is actually going to be… I can use the measure tool and just click, move the mouse, and I can see the island’s going to be 2500mm long, which is a nice size island. So we’re happy with that. And I’m just going to escape to get out of the measuring tool.
And like I said, I want to have a meter between. I’m going to have a stove and cabinetry on this back wall, and then I want a meter gap to the island. So if I use the lines again, and from anywhere on that back wall, I can just click and move my mouse out, and I’m going to want 600mm, 600mm for the actual cabinetry on that wall. So I’m going to hit 600 and then enter. And then from that point, again, I’m going to make a line out a meter. And that’s going to be where the front of the island sits.
So, I could switch to the little rectangle now and basically draw a rectangle in. And like with the walls, Cabinet Vision is helping me snap to those points. So that’s going to be my island there. Now that’s not anything. These are just lines on the page. And I need to work out where my peninsula wall is going to go. So, if we remember back to our plan, we want to have a little bit of overhang on the back of the island for seating. And cabinetry on the front for a sink, probably a dishwasher and some other cabinets. So, I’m going to assume that this island is going to be 900mm overall in depth. And I’m going to allow 600 for cabinetry on the front and 300 millimeters for overhanging on the back.
So, if I click in here… From the front of the island, I’m going to draw a line back 600, typing in 600 and hitting enter, and that is going to be where I want my peninsula wall to sit. So, just to make my life easier, I can draw a CAD line across there. Escape. I might get rid of this big box that shows the island for now. So I’m just going to click on that and hit delete. And then I’m going to hit escape to get back to my plan view, my plain view. And I’m going to go back into doing walls.
So I’m going to click walls. And this time I don’t need multiple walls attached. So I’m just going to use the plain line. And I’m going to draw from right to left this size… thinking about drawing in a clockwise fashion, and about where the front and back of the wall is. So if I draw from the right over to the left, so we had to see with that line there, but if I draw it out that way, you can see that the thicker line, the front of the wall, is facing up. Which is where most of my cabinets are going to attach to that side of the wall. So I’m going to hover it across on that CAD line. It’s a 2500 and here ends up.
So right now, if we went back to our 3D, you’d see that there’s a full wall there in the middle of the room, which we don’t want. So if we go back to plan, click on this island wall, and over on the side here where it says style, we can change the style from being a standard wall to a peninsula. When we do that, you can see that it’s… I’m just gonna double-click and delete these CAD lines so that they’re not in our way. So I can delete all of these now that I’ve got my placement. So now I can see this red line, that’s the peninsula wall. So again, this still has a front and a back even though we can’t see it as clearly now, but we can see that the dimension is always going to be on the back of the wall. So that showing that the front where the cabinet is going to attach to is going to be from the inside of the kitchen there.
So this is basically the kitchen walls all set up. One little tip that I always like to do when I am setting up my walls is to think about which walls are actually going to have cabinets on them and which are just there to give some perspective about how the room is shaped. So on my plan, I’ve got cabinets on the sink wall and cabinets on the back wall, but I haven’t got any actually attaching themselves to the two side walls. So I’m going to on both of those side walls, click on them. And over on the side here it says Wall End and you have the option for it to be yes or no. I’m gonna make that yes. The reason that I’m doing that is because when I’m going through my elevations now, I only have two walls; Wall #2 and wall #4.
Before I would have had four walls, if I just make that one not a wall end anymore. And I go to elevation, you’ll see that it’s in the list, which means that as I sort of flick around the room, it’s going to come up as a wall that I see, which is fine, but I find it’s just a bit annoying sometimes. So I like to make walls that aren’t going to have cabinets attached to them wall ends from the get-go, to make my life a bit easier.
So this is a really good point to save your working drawings right now. I can save them under whatever name or place that you like. And then in the next section, we’re going to start adding in our cabinetry.
Let’s Add in Our Cabinets!
Alright, so we’ve done all of the setup work. We’ve set up the job properties. We’ve set up the walls. Now comes the fun part where we actually get to add in the cabinetry to the room. So, first thing we need to do is go back to the Builders plans and have a think about what we know and also any assumptions that we can make because it’s best to have a bit of an idea of what we want to design before we start just randomly throwing in cabinets… so that it will save us time in the long run.
So, from our Builders plan, basically we don’t know a lot. But what we do know is that they want to have the stove centered to the back wall. They want to have their sink on the island, and they want us to allow for some overhang on the back of the island. So that’s all we know. We don’t know exactly where they want us to put the fridge, but every kitchen needs to have a fridge, so we’ve got to include one in there somewhere. We can’t see any special room for a pantry. There’s no walk-in pantry. So we want to include something for food storage as well. So I’m thinking maybe we’ll do a tall cabinet with shelving inside for a pantry. And they also haven’t shown a dishwasher, but being the modern world that it is, I think probably will include a dishwasher provision on the island next door to the sink. Because that’s usually a nice pair to go together.
So we’ve got our knowns of the stove, the sink, the overhang, and we’ve got a few assumptions that we’re making as well. Let’s move back to Cabinet Vision and work out where we’re going to start and start bringing in those cabinets. So I’m going to start along this back wall. And what I’m thinking… I’ve just moved from plan to elevation so that I’m looking at it front on. And what I’m thinking is that I would like to make the stove in the center looking really nice. What we’re going to do is have a tall pantry down one side and have the tall area for the fridge with an overhead above it, down the other side. Hopefully we’ll have enough room for some drawers in between on either side of the stove for pots and pans. And then we’ll do just simple upper cabinets above the bench top (countertop) and the stove area.
So, what I like to do is grab out a calculator and just do a little bit of simple working out to see sort of how many drawers, how many doors I might be able to allow. So in this case, I’m going to start with the full length of the wall, 4500mm. And I know that we have to have a stove in the center, and I know that that stove is going to be 900 millimeters wide. So I’m going to take that off, which leaves me with 3600 to play with. From there, I’m thinking the fridge alcove probably needs to be about 900mm wide, and we could match that identically with the pantry on the other side. The pantry, we do have a bit more flexibility with, so if we need or want more or less space, we could add or take from there. So I’m going to take off 900mm for the fridge to start with. And then I’m going to take off, I’m going to say from the get-go, let’s have a meter for the pantry on the other side to have a nice big pantry. So a meter, which leaves us with 1700mm left space for cupboards (cabinets) or drawers. Which if we divided that into two equal sections, would give us 850mm and 850mm. Which is a really nice size for a set of drawers either side of the stove. So that little plan’s going to work pretty well.
We do have to just adjust it as we’re drawing for the end panels that we need to include space for. We also need to leave a little bit of room around the stove for the stove to actually slide in and out. And we’re gonna need a couple of fillers at either end of the walls. So we’re not gonna go to those exact dimensions. But roughly that gives us the idea of what we’re working with.
Okay, so I’m going to start by adding in the pantry cupboard (cabinet). So you can add cabinets into your drawing either on the plan view or on the elevation view. You see, on both of these views you have this object tool at the side. So if I’m in the elevation view and I open up objects, I have a few options here, but the one that we’re going to be using for this example is custom cabinets. If you’re working for a cabinet making company, they might have their own catalog pre-setup, with some of their own standards, and typical cabinets that they like to use. So feel free to use those instead if that’s what you’re working with.
So for the first thing we need is a filler to go up against the wall. Walls are very rarely perfectly straight, so we usually need to allow filler for our installer to have a bit of play when they are putting the kitchen in. So we’re just gonna want to have a simple tall filler. So I’m gonna click on that, drag it over into the white space, and you see how I’ve got that little sort of cabinet-looking box with an ‘add’. Right now I’m holding down my mouse, but if I let go of my mouse. You can see that I get this dashed outline of the filler. So that’s showing me how big it is, and what it’s going to look like. And as I move my mouse around, I can choose where to place it. I want it to be right up against this wall. So what I’m going to do is just slightly overlap that dashed box with the wall. And then I’m gonna click to release this filler.
So, now that I’ve done that, you can see that this filler has come in at 2380mm high and 76mm wide. That’s pretty wide for a filler, so I reckon we might just click on that and take it down to, let’s say, 35 millimeters. Beautiful.
So now we have our filler in the next thing we want is the tall cabinet that is the pantry. So again, we go to objects. We can go all the way back to the catalog. Again, custom cabinets, and we want a tall unit. So here we have the option for doors, corners, blah, blah, blah. So we’re going to go for Door, and we want it to have Tall Door. We’ve got a door that’s hinged from the left, a door that’s hinged from the right, or a pair door. If I just move my little self out the way here, you can see when I click on each of these, I’m given a little preview in this dialog box down the bottom. So you can see, and as I click and drag on that box, I can move the cabinet around to have a look at it. So if I had a look at this tall open cabinet, I can see what it’s going to look like. It’s a little preview for you. So if you’re ever not sure what it is, you can use that little box. Ok, I’ll just move myself back.
So door, we want a tall door pair. Again, I click and I drag it over onto my page. Let go to get my dashed box and then click again to release it. And again, if I overlap it slightly with the previous item, in this case, the filler, it’s going to butt up against the filler rather than leaving a gap in between. So I’m gonna click there. And now I have a tall cabinet. So that’s looking really nice, but you can see it’s come in at 762mm wide, and I said that I was going to allow about a 1000mm or a meter for my pantry area. So in this little width column that’s highlighted yellow, if I just start typing in dimensions in there, that’s what it’s going to affect is the width. So I’m going to say the 1000mm allowance, And I’m going to take off the 35mm that I have taken up with the filler. And I’m also going to take out another 16mm for my end panel that’s going to go on the other side of the pantry. Hit Enter. And that gives me 949mm.
So let’s put that end panel on now. Right now if we were to build this, we would see an unfinished carcass end on that right hand side of the pantry. So we’re going to need to put in a tall panel. So we go back to tall. Down to column fillers and panels and we want to have a panel. And we’re going to choose the option that goes right down to the floor. So I’m gonna click and drag that in. Now with these skinny ones it can be a little bit trickier to overlap. So if you ever miss your overlap and you drop that panel in and it ends up being a bit of a gap in between–you see I’ve got a 21mm gap there– it’s really easy to fix. You just click back onto the panel and then click on left and make that zero. And for some reason this panel has come in at 19mm, but you can see it’s not taking up that full width, so I’m just going to take that down to 16. Beautiful.
Okay, Also you can see that I’m zooming in and out, but I’m doing that is just scrolling the little scroller on my mouse. It’s also really handy to know that if you are scrolling in and out and you end up really far away from your drawing somehow and you’re like, I’ve lost my drawing, I’ve lost my page. You can also use these buttons up here to zoom in and out. So, the window is going to zoom a certain section. Out is out. And this button for all, if I click on that one, it just takes me right back to my elevation in a nice page view there. So don’t worry if you ever lose your drawing while you’re zooming. You can find it again by just clicking on all. Another good thing to also know is that when you are zooming, if you want to move around the page a bit, if you click, or press down on your scroller that you would normally use to zoom in and out. If you click down, you can sort of grab the page and move it. So if you know you’re zooming in and then you realize, oh, I want to look at that part over there. You can click on your scroller and