9 Tips for Cutting Acrylic Using Cabinet Vision
By Christopher Manclière, Senior Software Specialist at Planit Canada.
Many of our customers who’ve been cutting wood panels with their Nesting CNC router are now looking for ways to cut plastic panels with the same machine. Because working with plastic materials requires a little bit more care than cutting wood, there are some basics you need to know in order to ensure success. Scroll down to see our 9 pro tips for cutting acrylic using Cabinet Vision.

Figure 1 – Reception desk with acrylic panels in Cabinet Vision

Figure 2 – Cross Section of an acrylic end panel in Cabinet Vision
1.Material Manager. In Cabinet Vision you create the acrylic as a Panel Stock material in the material manager. It’s really similar to a glass material in terms of finishes and texture.
2. Assigning a tool. You’ll need to assign a tool to this material to make sure it doesn’t use the same tool as your typical wood panels.
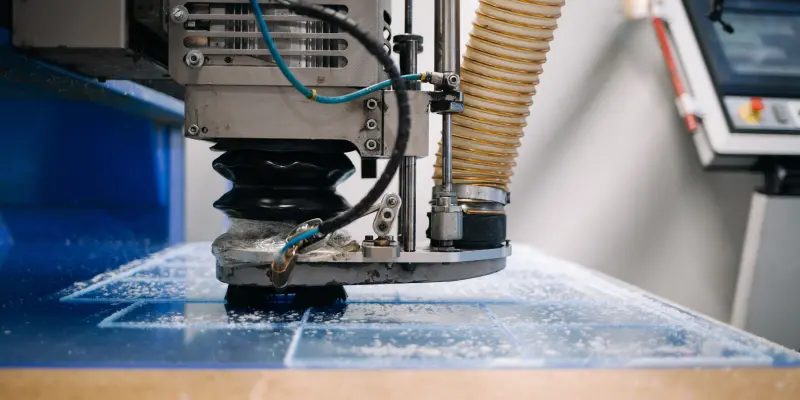
3. Selecting the right bit. You need to use a bit designed for acrylic cutting. An up-shear tool is recommended for this type on material. The O-Flute Bit is a good choice.

4. Bit diameter. If you cut large panels, it’s better to use the largest diameter of bit possible to be able to cut deeper in a single pass and have a better finish. A good rule to determine the cut depth, is to cut half of the tool diameter in a single pass (for a 1/2 bit you will have a 1/4 pass depth).
5. Feed Rate. The feed rate would be slower than when you cut wood. For an 1/2 bit you could try a feed rate of 200 inch per minute (5 meter per minute)
6. Spindle Speed. The spindle speed (Rotation Per Minute) would be on the high end (18000 RPM). If you go faster than 18000 RPM you may have to increase the feed rate as well to prevent melting of the plastic.

Figure 4 – Setup of Tool in S2M Center
7. Run Tests. You need to run some test parts and find the optimal cutting feed rate and spindle speed for your machine. The settings above are just a starting point. The idea is to get a good clean cut without melting the plastic as it’s being cut.
8. Suction. You need good suction on the CNC machine table to secure the acrylic parts. Excess vibration can result in poor finish.
9. Protective film. You can leave the protective film on the bottom surface on the acrylic panel while cutting.

Figure 5 – Optimization of acrylic panels in S2M Center
If you have any questions for our team about how to retool for cutting acrylic, contact us at tech@planitcanada.ca.