How to Create a Waterfall End Panel in CABINET VISION
- 1.Become a CABINET VISION Power User: Navigating the Texture Manager [VIDEO]
- 2.A Guide to Panel Stock Materials in CABINET VISION [VIDEO]
- 3.Elevate Your Designs with CABINET VISION’s x2D CAD Multiplier [VIDEO]
- 4.How to Import and Install Packages in CABINET VISION [VIDEO]
- 5.How to Modify Cabinets and Expand Your Design Catalog in CABINET VISION [VIDEO]
- 6.How to Create a Toe Height Attribute in CABINET VISION: A Step-by-Step Guide [VIDEO]
- 7.How to Adjust Sunlight and Shadows in CABINET VISION Renders [VIDEO Tutorial]
- 8.Mastering Room Mirroring in CABINET VISION: A Step-by-Step Guide
- 9.From Design to Delivery: Splitting Large Parts in Cabinet Vision
- 10.Creating Stunning Curved Island Designs in CABINET VISION
- 11.Precision Placement: Using 2D CAD to Position Peninsular Walls in CABINET VISION
- 12.Yes, You Can Add Inset Drawers Behind Tall Doors in CABINET VISION—Here’s How!
- 13.Custom Drawer Dividers in CABINET VISION: A Smarter Way to Maximize Storage
- 14.Lost Your Work? Two Ways to Recover Jobs in CABINET VISION
- 15.Static vs. Live Drawings in CABINET VISION: What’s the Difference?
- 16.How to Add a Door Profile to End Panels & Save Custom Panels in CABINET VISION
- 17.Mastering Layers in CABINET VISION: Make Your Drawings Work for You
- 18.Let’s Draft Up a Job in CABINET VISION – Part 1: Layout, Setup & Smart Starting Moves
- 19.Let’s Draft a Job Up from Scratch in Cabinet Vision Part 2
- 20.How to Add Inner Drawers (Rollouts) in CABINET VISION
- 21.How to Create a Waterfall End Panel in CABINET VISION
- 22.Stop Repeating the Same Cabinet Modifications Over and Over
Waterfall ends add a sleek, high-end finish to kitchen island designs. In this tutorial, we’ll walk you through one simple way to build them using CABINET VISION 2025—complete with tips on matching textures and managing edge banding.
What’s a Waterfall End?
In CABINET VISION, a waterfall end is usually built using a base end panel, placed at the end of a run of cabinets or an island, and then customized to match your countertop.
There are many ways to build a waterfall end, but this guide shows a quick and clean method that’s easy to repeat and customize.
Step-by-Step: Build a Waterfall End in CABINET VISION
Watch the video below to learn how to create a waterfall end panel for a kitchen counter or island or simply follow the steps below.
Click here for video script
G’day! How are you going? It’s Clayton from Planit Canada with another Cabinet Vision tutorial.
Over the last few weeks and months, we’ve had some cracking questions come in on our videos. So we’re going to endeavour, over the next week or so, to get through as many of them as we can.
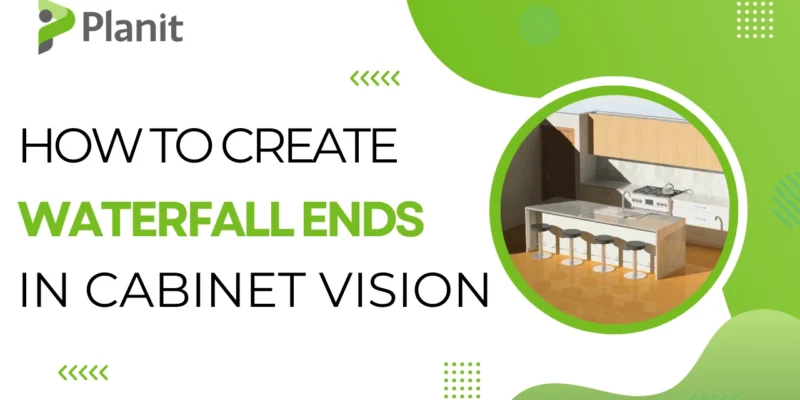
And in our video today, we’re going to pose this question. ‘How do I create waterfall ends like I see here in this real nifty 3D render?’
It’s actually quite simple to do. There is a bit of a ‘trick to the trade here’. So we’ll go over that together.
But as always, if you’re watching this and anything comes to mind, you’re like, “Oh mate, that’s interesting. How did you do that?” Please feel free to leave those questions in the comments below, and we can create more video tutorials like this to get you the answers you need.
So waterfall ends in Cabinet Vision. What have we done here?
Well, let’s go to our elevation view and have a look at what this part actually is…
I will preface this by saying, you know, in Cabinet Vision, usually there are many ways to ‘skin a cat’. There are usually multiple ways that we can approach the same problem and come to the same solution.
So if you watch this and you think to yourself, well, that’s not how I do waterfall ends. Well, let us know how you do waterfall ends because that could help out a lot of people who might be in a similar situation to you.
But usually, there are a few different ways that we could approach it. I’ll go through one of those ways that is very simple with you today.
So what you may notice right away is that both of these waterfall ends, they’re just normal end panels. That one’s a base end panel, and this one is a base end panel.
If you’re looking at this and you’re wondering how you can create your own end panels, check out our last ‘Your Questions Answered’ video. It looks a little bit like this… and in that video, we tackle how you can create your own end panels step by step.
But both of these end panels here… if I were to double-click on one, then from the Face, Plan or End view, right-click on that part and then go to Properties. What you’ll notice is that I’ve manually changed this end to use the same material that’s being used for my countertop.
I could also, if I wanted to, right-click on this part, go Properties, go Parameters, Add and then just go ‘ _NOCNC ‘, make that value 1.
Okay, and now this part won’t be sent to the S2M Center at all.
That’s another solution for you, if you would like to create a waterfall end part and save it to your catalogue. And never have to worry about it going through to the S2M Center.
If I wanted to, I could go to my 3D view, and here I could click on the part and just control which texture is being used for this waterfall end. I could go to my Countertops folder and my Texture Manager. I could choose any of these. Let’s just go to the ‘green marble’.
And now if my countertop were using that same green marble texture, I could control how it appears on these waterfall ends as well.
So just to make sure we’re on the same page, let’s click return. Let’s combine all of those steps together in context and create a new waterfall end from scratch.
So we’ll delete this one here. And as we go through and create this waterfall end, we’ll get the chance to highlight a brand new feature of Cabinet Vision 2025 that I’m stoked about. It’s really cool.
So if we go to our Objects and we find our end panels, we’ve got our base end panel here. I’m going to put it where I want the waterfall end to be.
Now I’m going to double-click on this part…
And before, how did we change this part so that it was using the same material as the countertop?
We went to the Face, Plan or End view. We right-clicked on the part itself. We went to the Properties. So we’re on the part properties. We’re on the part level now of the Cabinet Vision Hierarchy. We changed the material here.
However, there is another way we could do it in Cabinet Vision 2025.
If I go to section view, we click on properties, and we go to material. Now, Cabinet Vision gives me the ability to control the schedules or the construction methods on single assemblies as well.
So it’s amazing the implications of this. Think of how you can control all sorts of settings in your construction methods on just particular assemblies now, or on our materials.
We can control every single material on every single part of just this specific assembly.
In the past, we’ve been able to do it on the job level, in the job properties or on the room level, in the room properties. But now we have complete control over all of those different settings in a single assembly as well.
So it’s much of a muchness in this specific scenario because we could do it both ways. But I’ll show you if I click modify for this assembly, we just need to find the finished left end. So that’s under Case, Exposed, and there’s the finished left end there.
So I just need to tell Cabinet Vision that when you use this schedule in this assembly, the Finished Left End is going to use this material instead.
Then we can click return, update the assembly with changes and okay.
And now Cabinet Vision has turned this part into that granite material, and we can see that visually with the wider thickness.
But you’ll notice at the moment that the thickness setting for our part, that 31mm, is different from the thickness setting of our assembly, 19mm.
So what we need to do is just tell Cabinet Vision that these two settings need to be identical and that they need to follow each other.
So what I’m going to do is move myself out of the way. We’re going to open up our Object Tree at the bottom left here. Then we need to find the Finished Left End. So that’s under Case, Finished Left End.
Then you’ll see we have this D-Z setting here. This is the thickness of our part. So we’re going to copy that.
And now we just need to tell Cabinet Vision that instead of a single value for the assembly, you need to follow that part’s thickness.
So we’re going to go to our standard base cabinet. We’re going to click on the DX value. I know that’s the 19mm. Double-click on that. We’ll click on Equation.
And we want to essentially say to Cabinet Vision, if one, or if true, then this value needs to be identical to this value.
You need to search here to know which value you’re going to use, so we can click Test, and it’s saying great, I’m coming back with 31.8, that’s what we want, we’ll click Ok and now those two settings are identical.
If we go to our 3D view now, we can go home…
Here, we can just control the texture that’s being used for this waterfall end. So I’ll click on that, and the texture that matches our countertop is the white carara… white carara… white carara… white carara… It’s this texture here!
So we’ll double-click on that and great it’s looking good.
One thing though, that I’ve just noticed, having changed the texture, is we still have the edge banding attached to that, so we just need to remove the edge banding so we’re going to end right-click on the part go to our edge banding settings we’ll click on the Edge Banding and we’ll just make that None we’ll save that.
Return… Return… and we can go back to the elevation view now.
And that’s our waterfall end!
So it’s not mind-blowing, it’s very simple. It just requires that we trick Cabinet Vision a little bit. But otherwise, that’s a pretty simple waterfall end that anyone could do in their Cabinet Vision.
But I’m also trying to think about some of the questions you might have based on that. Maybe you’re wondering how you price these materials, or maybe you’re wondering how you make sure that those panels price correctly.
If you’re curious about that, let us know in the comments below, and we can create a video that specifically answers that for you.
1. Place a Base End Panel
Open your project and navigate to the elevation view. Head to your Objects and find the base end panel. Place it where the waterfall end is needed.
2. Change the Material
Double-click the end panel, then right-click on the part in the Face, Plan, or End view. Go to Properties, and change the material to match your countertop.
💡 Tip: If you don’t want this panel to go through S2M, add the parameter _NOCNC and set the value to 1. That way, it won’t be sent for machining.
3. Customize the Texture
From the 3D view, click on the panel and use the Texture Manager to choose a surface texture that matches your countertop—for example, a marble or stone finish from your Countertops folder.
4. Use the New 2025 Feature: Material Overrides at Assembly Level
CABINET VISION 2025 now lets you override construction methods and materials at the assembly level. This means you can assign a different material just for this part without impacting the whole room or job.
- Go to Section View
- Click Properties > Material > Modify
- Find the Finished Left End (usually under Case > Exposed)
- Assign your desired material
- Click Return and update the assembly with changes
5. Match Panel Thickness
- Open the Object Tree (bottom left)
- Find the Finished Left End under Case
- Copy the D-Z (thickness) value
- Then go to your base cabinet assembly and update the DX value to follow the part’s thickness using an equation: if(1, [paste value here])
- Test it to confirm it returns the right thickness (e.g., 31.8mm)
6. Remove Edge Banding
Right-click the part, go to Edge Banding Settings, and change the edge banding to None. Save and return.
Done! Your Waterfall End Is Ready
Check your 3D view and elevation view—your waterfall panel should now match your countertop in both material and thickness, with no edge banding and no machining if you applied the _NOCNC parameter.
Bonus Tip: Want to Save It to Your Library?
Once you’ve created your perfect waterfall end panel, save it in the catalog of your Cabinet Vision custom cabinet design software, so you don’t need to rebuild it from scratch next time.
Have Questions?
Are you wondering how to make sure this part prices correctly in your bids? Or how to automate the process with custom construction methods? Let us know. We’re here to help—and we might just feature your question in our next tutorial.